
MMA integration
Escaping a takedown against the cage
At a padded fence you have less room behind your hips. Build a base, fight for an inside arm and turn toward open space if the grip allows. Once you have been taken down, the job changes to getting off a hip and back to your feet.
The diagrams explain positions and decisions. Independent coach review is pending. Practise contact entries and finishes on mats with a qualified coach.
On this page
Illustrated checkpoints
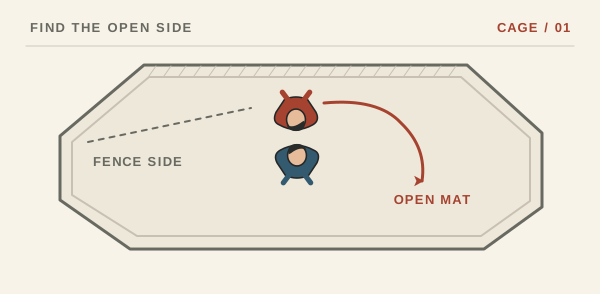
- Build a base. Keep the feet under the hips against a padded boundary.
- Find the inside arm. Work back to an underhook or inside contact appropriate to the grip.
- Turn to space. Move a hip off the wall and turn only if the partner's grip allows.
- Reset if grounded. From seated, recover a supporting foot under the hips before rising.
Recognize the starting position
You should know a static underhook and be able to hold a staggered stance under gentle shoulder contact. If the attacker has one arm inside, bringing your elbow back between the bodies can help you recover a useful tie. If their hands are already locked around both legs, an underhook alone will rarely solve that grip. Freeze there and ask for the appropriate defense.
Use the wall without grabbing it
With the feet on the mat, move one hip slightly away from the padding when space opens. A coach can show the underhook and small turn that let you face open mat. The ABC rules distinguish pushing off the fence from grasping it to control the position. Practise on a padded wall with open hands and no fingers in mesh.
When the exchange drops lower
From a seated wall position, make room for one hip and bring a foot beneath you before trying to rise. Keep facing the partner and address their arm connection. Begin this as a separate floor drill on a clean matted boundary. Add light resistance only when both partners can release on cue. No strikes, throws into walls or lifting returns.